Showing posts with label Creative Shots. Show all posts

Sunday, November 22, 2009

Creative Shots - Blurred Motion

Sam was jumping on my bed this morning and wanted me to take a picture of him flying like Superman. The result?


The boys love these types of pictures where it looks like they are moving quickly. I do, too, so we have tried different techniques to see what works.

In the picture of SuperSam, I set the camera on a slow shutter speed (1/20 of a second) with the flash on. The flash provided the light to illuminate Sam, and the slow shutter speed provided the light for the background, which blurred as I moved the camera. This is called motion blur. The slow shutter is also the reason the window can be seen through Sam's arm -- after he "flew" out of the way, the light from the window came through where his arm used to be.

Using the flash to "freeze" the subject while moving the camera to provide the blur also works well on moving people outside. In the following pictures of Sam and Boyd from last year, I used the flash plus slow shutter technique in the evening.


If you cannot manually set the shutter speed on your camera, or if you do not know how to do that, do not worry. Most (all?) point-and-shoot cameras with a built in flash have a flash mode called "slow-synch" (or "nightshot" or "monument" or something similar) that will automatically fire the flash with a slow shutter. (This flash mode also works well for taking pictures in front of monuments at night or at other places where you need both the flash to light up the people in front and enough time to record the dimmer lights in the background.)

When creating motion blur, it is very helpful to track the moving people with the camera to minimize the amount of ghosting caused by the long exposure. If you are good at tracking people with your camera as they move -- or, really, whatever subject you are shooting -- and have a little more light available than twilight, you can even get decent motion blur without using a flash. I am not very good at tracking, so I have to take a lot of these shots to get some that are not a blurry mess! The following are Sam and Boyd an overcast fall day a few weeks back.


They are not great, but they do demonstrate motion blur without a flash. One of Blanche's relatives -- someone who is much better at tracking than I am -- took the following picture of a girl pushing her uncle on a skateboard. I wish I could take pictures this good!


This picture is also great because the photographer got low and close to their subject, which was the topic of a previous creative shots post.

Play around with your flash modes, practice your tracking, take lots of pictures (hey, it's digital, so it's not like you have to keep the bad ones!), and if you get anything good that you would like to share, send them to GAP!

TIP: Find out what the different modes on your camera can do. They are there for a reason!

UPDATE

We were remiss to not point out yesterday that Susan posted on her blog a different flash technique for capturing the motion of falling snow. However, we are concerned for the environment that she may burn through a lot of batter recharges trying to capture, as she points out in the comments,"an individual snowflake and a blurred background." Good luck, Susan, and send that picture our when you get it!

Thursday, October 22, 2009

Creative Shots - MDOLCTNO Revisited

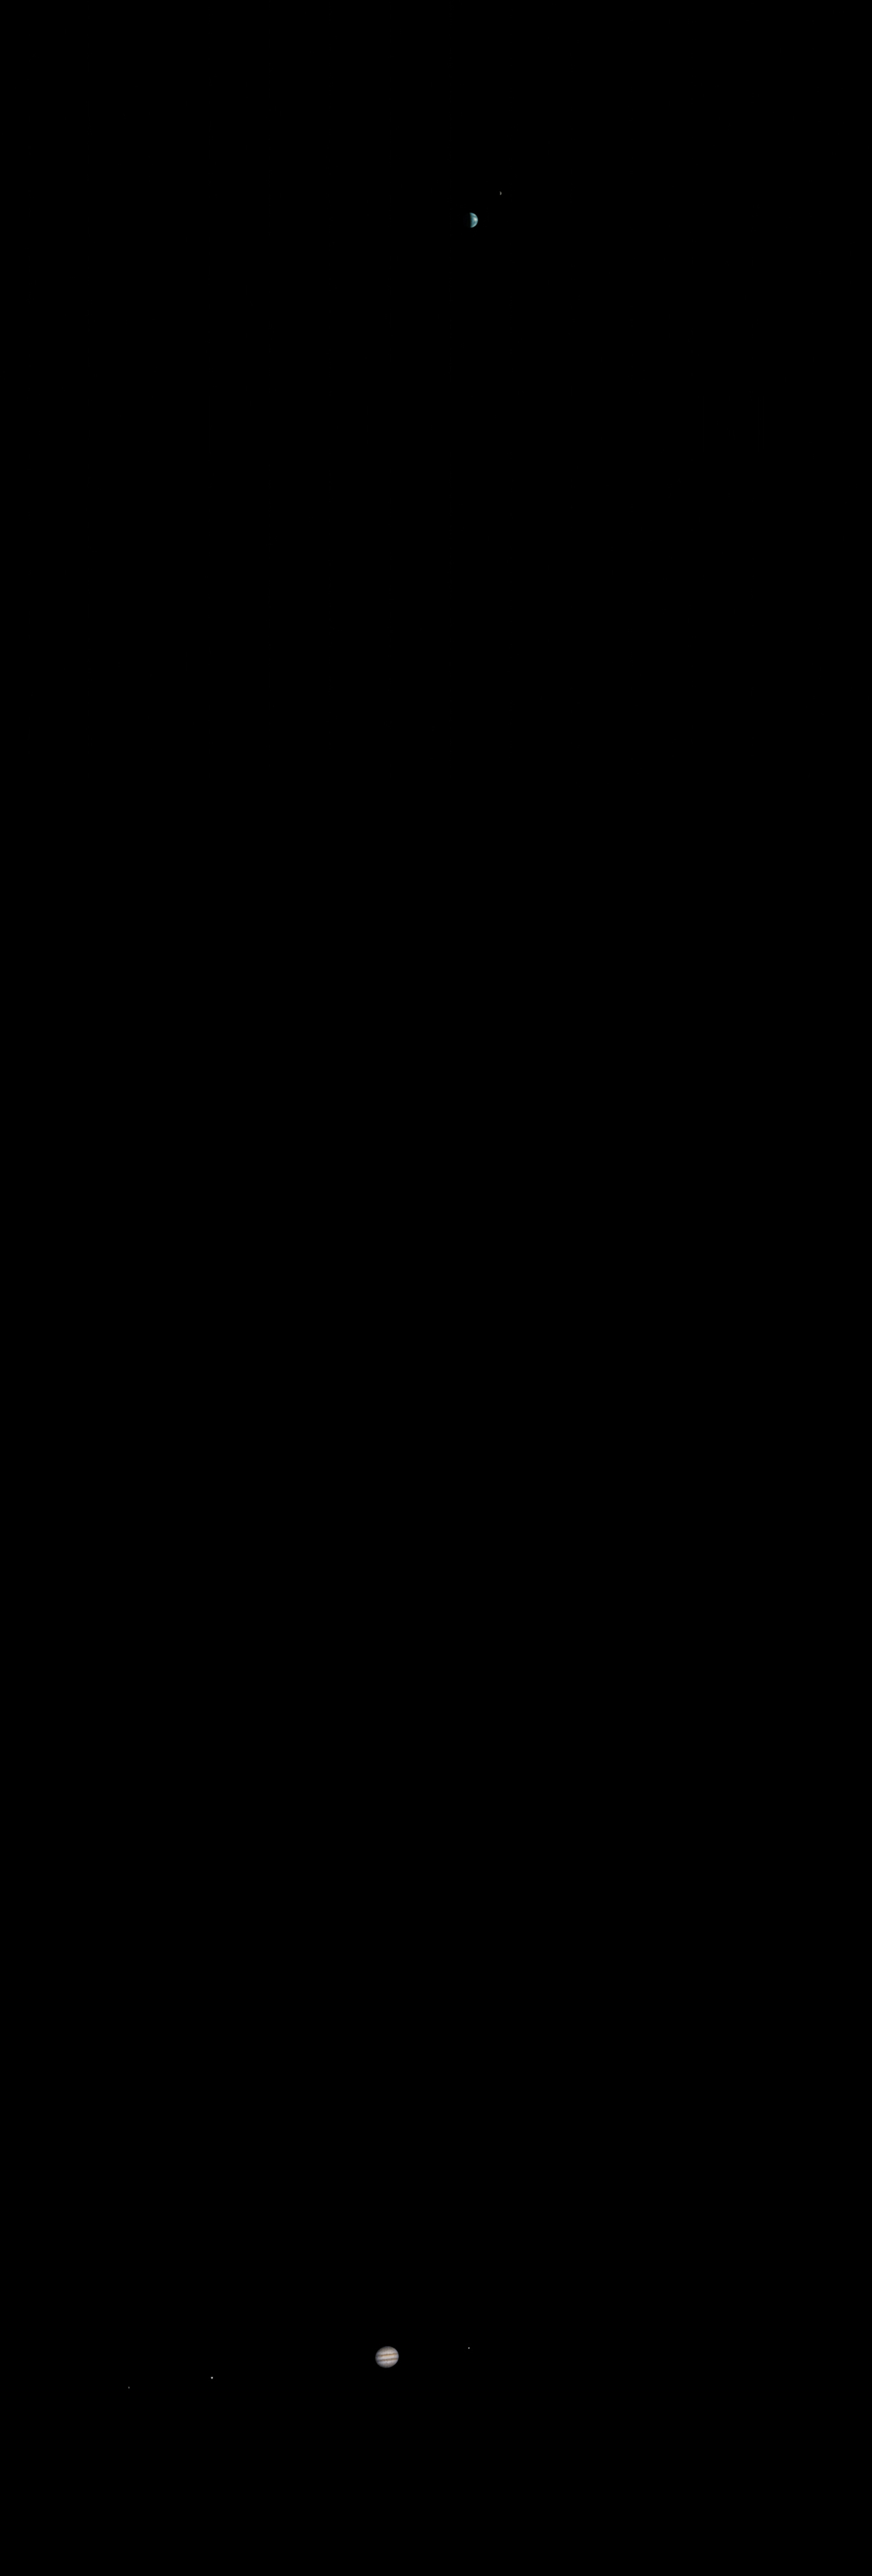
In a previous Creative Shots post we looked at making distant objects look closer to near objects. I just found a picture that demonstrates this principle on a much, much larger scale.

In this picture -- taken by a satellite orbiting Mars! -- both Earth and Jupiter can be seen. You should click on the picture to look at the really big version. Earth was about seven times closer to Mars than Jupiter was when the picture was taken, so it looks proportionally larger than its actual size. In reality, Earth's diameter is approximately the height of one of the red bands visible on Jupiter.

A description of this picture, including a diagram showing the relative position of the planets, is available here.

One night at the Stutz farm picnic area Grandpa described to me how to calculate the time of night by looking at the stars. It was a complicated formula that, as I recall, used the day, month, and position of the Big Dipper. While I no longer remember Grandpa's formula, I haven't forgotten to look up at the stars with awe, and wonder what else they will teach us.

UPDATE

John jokes in the comments, asking how I managed to "catch a ride" to Mars to snap the picture. I may be spacey at times, but I have yet to make it to Mars!

He got me thinking that now is a good time to check how far I'd get using the money I've been saving in my "Mars Trip" mason jar, which currently has $10.20 (including the Susan B. Anthony coin that I really don't want to spend unless I absolutely must). My best guesstimate is: $30 million to go to the International Space Station ÷ 230 miles for the average ISS altitude ÷ 5280 feet = about $25/foot of altitude to travel to space. So, my $10.20 should get me about five inches toward Mars at current space travel rates. Don't hold your breath for my Mars photo, John!

Sunday, October 11, 2009

Creative Shots - Making Distant Objects Look Closer to Near Objects

Using your camera to zoom in on a distant object seems like a pretty straightforward way to make it look closer. Sure, you could walk to the object, but then it wouldn't be distant. Let's explore how we can use your camera's zoom creatively.

When you use your zoom, the camera takes a picture of a more narrow portion of what the camera normally sees without the zoom. For example, when I take a picture of the night sky without zooming, even a full moon looks very small. When I want to take a picture of the moon, I use my zoom to take a picture of the narrow portion of the sky around the moon. How narrow the portion of the sky depends on how much my camera can zoom. The more I zoom, the more narrow the view of the sky I see in the camera and the the larger the moon looks. The moon isn't getting any bigger, and I'm not getting any closer to it; I am just looking at a more narrow part of the sky.

"Angle of view" is the phrase for how wide or narrow the camera can see, and for most cameras this is adjusted with a zoom lens. A wide angle of view lets us see a lot of stuff, useful (for example) when shooting pictures at an indoor birthday party. A narrow angle of view lets us see a smaller amount of stuff, useful (for example) for shooting pictures at a baseball game.

What happens when we are taking pictures of different objects, some of which are close to the camera and some of which are further away? (Farther away? Help me grammar nerds!)

These pictures from last year both show Boyd and Sam sitting in the same place next to the Washington Monument, apparently after eating blue popsicles. The Lincoln Memorial is just under a mile away. In the first picture, I got close to the boys and took the picture with a wide angle of view, making the Lincoln Memorial look smaller than the boys' heads. In the second picture, I walked back a bit and zoomed in on the boys, using a narrow angle of view that made the Lincoln Memorial look larger than the boys. Because the Lincoln Memorial looms larger in the second picture and the distance to it looks compressed, it looks closer to the boys (QED, for the grammar nerds still reading).

This technique can also be used to make little boys look like they are giants crushing famous, distant landmarks. My boys will discover this someday and will be greatly amused by it. Until then, though, I will use this technique to compose creative shots of the boys.

By way of another example, last summer I took a perfectly innocent picture of Sam splashing a board in the Chesapeake Bay:

and made it look like he was playing in front of a nuclear power plant:

Don't worry, radiation is a source of superpowers (Hi Spiderman and the Hulk!).

I took the same picture this summer, but also included Boyd and a friend so they could be superheroes, too.

Let me know if you have any luck using this technique.

UPDATE

I found another image using this technique on a much larger scale at Creative Shots - MDOLCTNO Revisited.

Thursday, September 24, 2009

Creative Shots - Get Close and Use Macro

Over on her blog, Susan has some great images of thistles that demonstrate how getting close to the subject can add a lot of beauty and drama to a picture of what would otherwise be -- let's face it -- an annoying plant. Use the macro function on your camera (typically, it has a flower icon) for the best effect.

This works well with bugs:


And kids with bugs:


And just kids:


TIP: Get close to your subject, use the macro function, and practice by taking lots of pictures. One of them will turn out all right. (And, if not, keep practicing!)

Wednesday, September 23, 2009

Creative Shots - Fun House Mirror Cell Phone Effect

Dave posted a beautiful pair of pictures today of lightning over Mumbai, and it got me thinking. Family history is not just about archiving past events; it is also about documenting all the great things going on now. After all, without recording current events, there will no documentation of the family's history for future generations to reflect upon.

So everyone -- take pictures, shoot videos, keep a journal, record your family's oral history, and share it.

Sometimes, all I have handy to take pictures is my cell phone. I have found a way to take creative shots that -- due the inner-workings of my phone that I don't understand -- often makes pictures look like they were shot in a fun house mirror. The distortion takes a generic picture and makes it a little less boring.

Here are two pictures from a recent picnic in the park:

So how did I do it? No Photoshop here! I stood in front of my subject and threw my cell phone up in the air, spinning, while pushing the shutter button. Most pictures are lousy, and, really, they don't document much. But they are kind of interesting and the boys love them!

Do you have a favorite or useful technique to share? Let me know! Some are fairly low risk (throwing your cell phone up in the air) and others are higher risk (standing on a metal table on top of a building during a lightning storm). If it helps capture the moment, though, your techniques are welcome.

UPDATE

I found out that the effect is due to the rolling shutter processing used by CMOS image sensors that are common in cell phones and some still and video cameras.